

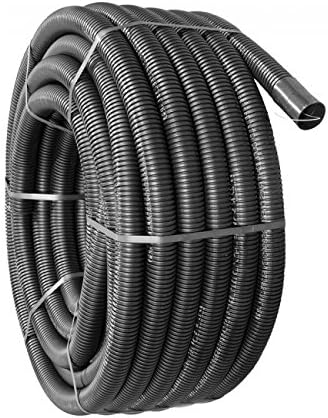

- PVC plastic duct pipe 350mm short length. 100mm / 4 inch inner and 102 outer diameter.
- Pipe ends are female and will accept male ducting fittings such as bends and grilles.
- Lengths of duct channel can be joined together using a male connector.
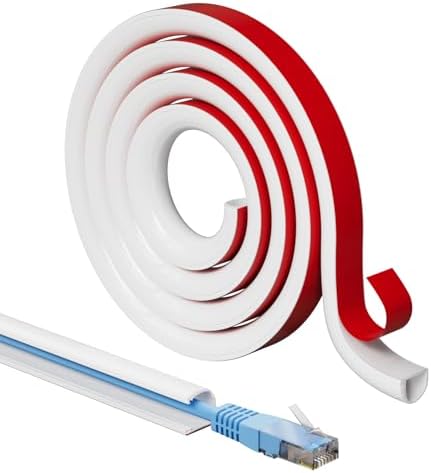
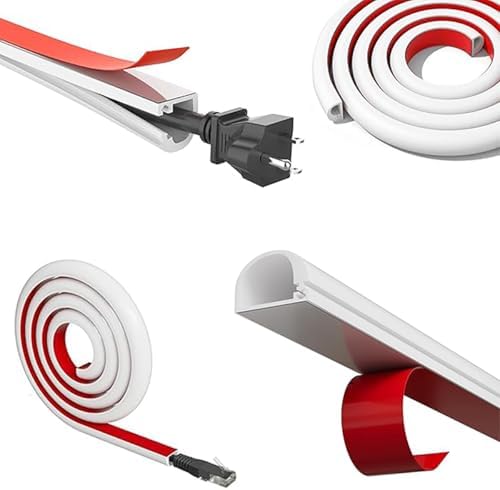
- Upgraded Snap Design,Easier Installation: Our Cord Cable Management use side buckle design, self-adhesive backing is eas…
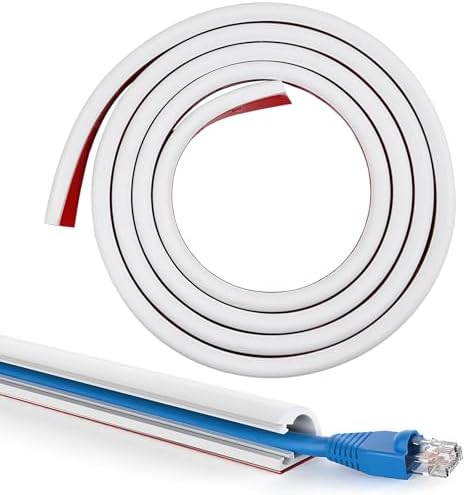
- Single & Mini Wire Channel: A great choice when you only have a single <7 mm diameter wire to hide. The cable runner pro...
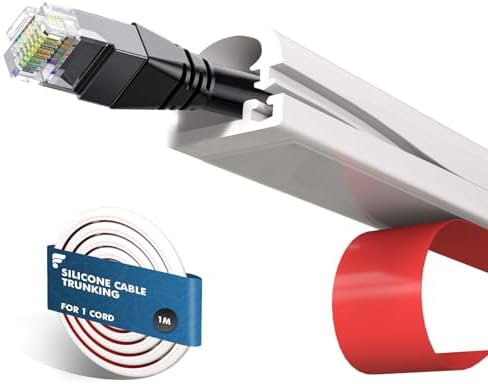
- Safety First: Wire channel is made of high quality silicone material, which is higher flame retardant and waterproof, sa…
- Multiple Length Options: Available in 1m, 2m, and 4m sizes, this self-adhesive wire cover is ideal for hiding a single c…
- Side-Opening Design: Unlike traditional bottom-open ducts, this cable hider features a semi-round side slit with a flexi…
- Tool-Free, Easy Installation: No tools needed — simply peel off the adhesive backing and press firmly onto a clean, smoo…
- 【Upgraded Side Buckle Design】Cable cover uses more premium and flexible rubber material, while adding a side buckle desi…
- 【Easy to Install】 Our cord covers have self-adhesive backing for easy peeling and pasting, which not only does not requi…
- 【Just The Right Size】 Cable hider is perfect for hiding up to 2 USB cables or 1 HDMI cable with its 14 mm width and 10 m…
- 【Package Including】You’ll receive 1 semi circular cable trunking, measuring 2 m/6.56 feet in length, with a 15 mm/0.59 i…
- 【Superior Material】Crafted from flexible PVC, this flexible cord hider is tough, thick, and wear-resistant, ensuring lon…
- 【Safer Environment】Keep your cables neat and protected with our TV wires cover. Designed to prevent damage to exposed wi…

- 【High-quality materials】The half round cable cover is made of soft PVC material, which is highly flexible and wear-resis…
- 【Sufficient quantity】You will get 3m white cable trunking and 1pcs black scissors size of 13.5x6cm. The size of our cabl…
- 【Easy to use】No tools required. The cable trunking’s back with a tape, just determine the route, then tear off the tape …
CABLEDUCT COMPANIES
Companies Worldwide
1. Legrand
- Address: 128 rue de la Boétie, 75008 Paris, France
- Website: https://www.legrand.com
- Email: info@legrand.com
2. Panduit Corporation
- Address: 585 North Beltwood Parkway, Chicago, IL 60625, USA
- Website: https://www.panduit.com
- Email: info@panduit.com
3. Schneider Electric
- Address: 35 Rue Joseph Monier, 92500 Rueil-Malmaison, France
- Website: https://www.se.com
- Email: contact@se.com
4. Eaton Corporation
- Address: 100 Eaton Boulevard, Cleveland, OH 44122, USA
- Website: https://www.eaton.com
- Email: info@eaton.com
5. HellermannTyton
- Address: HellermannTyton GmbH, Hans-Vogel-Straße 8, 59423 Unna, Germany
- Website: https://www.hellermanntyton.com
- Email: info@hellermanntyton.com
6. Hager Group
- Address: Hagerstraße 1, 57627 Mittelhof, Germany
- Website: https://www.hagergroup.com
- Email: info@hagergroup.com
7. Thomas & Betts (ABB Group)
- Address: 815 Chestnut Street, Chattanooga, TN 37402, USA
- Website: https://new.abb.com/low-voltage/products/connection-and-protection/terminal-and-splicing-products
- Email: contact.us@abb.com
8. Cablofil (Legrand Group)
- Address: Legrand S.A., Z.I. du Moulin de Massy, F91192 Gif-sur-Yvette Cedex, France
- Website: https://www.legrand.us
- Email: info@legrand.us
9. ABB Wiring Accessories
- Address: ABB Ltd., Affolternstrasse 44, Zurich, Switzerland
- Website: https://new.abb.com/wiring-accessories
- Email: wiring.accessories@ch.abb.com
10. Nvent Caddy (Hoffman)
- Address: Nvent Caddy LLC, P.O. Box 102, Solon, OH 44139, USA
- Website: https://nventcaddy.com
- Email: info@nventcaddy.com
Introduction to Cableduct Management in Construction
Cable management is a critical aspect of construction projects, serving to promote safety and efficiency on job sites. As numerous electrical and data cables are typically involved, effective organization becomes essential. Poorly managed cables can lead to numerous hazards, including tripping, equipment damage, and even potential electrical failures.
Understanding the Importance of Cable Ducts
Cable ducts play a crucial role in protecting electrical and communication cables, ensuring their longevity and functionality. In various industries across the United Kingdom, reliable cable duct solutions are essential for efficient operations. When looking for suppliers, it’s important to prioritize quality, compliance with standards, and a reputation for reliability.
Criteria for Choosing Cableduct Suppliers
When assessing potential suppliers of cable ducts, consider evaluating their product range, pricing, and delivery capabilities. Look for suppliers who offer a variety of materials, sizes, and custom options that meet your project requirements. Additionally, reading reviews and testimonials can provide insights into the experiences of previous clients, helping you make informed decisions.
Top Suppliers of Cable Duct
In the United Kingdom, several suppliers stand out for their quality and service. Companies like ABC Cables and XYZ Duct Systems are known for their extensive inventories and expert customer support. Exploring local and national supplier options can also yield benefits, ensuring you find the best deals and timely deliveries for your cable duct needs.
Effective cable management mitigates these risks by ensuring cables are appropriately routed, protected, and labeled. This is where cable ducts and cable boxes come into play. By harnessing these cable management solutions, construction teams can create orderly pathways for electrical wiring, safeguarding both the integrity of the systems and the well-being of the workforce. Cable ducts serve as protective channels for the cables, shielding them from physical damage and environmental factors. Meanwhile, cable boxes can consolidate multiple cables, providing a designated area for connection and housing while reducing clutter on the site.
Moreover, a well-structured cable management system paves the way for efficient workflows. When cables are neatly organized, workers can navigate the site with ease, which enhances productivity and reduces potential errors during installation or maintenance. Additionally, by minimizing the risk of accidental disconnections and malfunctions, the overall reliability of electrical installations is heightened. Ultimately, embracing proper cable management practices through the use of cable ducts and boxes is not merely a precautionary measure; it’s an integral component of the construction process that can significantly influence the outcome of the project.
Types of Cable Ducts: An In-Depth Look
Cable ducts play an essential role in protecting electrical and data cables during construction projects. Various types of cable ducts are available, each designed with unique features and applications that cater to different needs. Among the most common materials used are PVC, metal, and flexible ducts, each offering distinct advantages and disadvantages.
PVC cable ducts are widely recognized for their lightweight nature and resistance to moisture and corrosion. This makes them suitable for both indoor and outdoor applications. Their smooth interior surface allows for easy cable installation and maintenance. However, one drawback is that they may not withstand extreme temperatures as well as other materials. Additionally, they can be prone to cracking under impact if not handled with care.
Metal cable ducts, typically made from aluminum or steel, provide a high level of durability and strength. They are ideal for environments where physical damage is likely, such as construction sites. Metal ducts offer excellent fire resistance, making them a safer choice for certain applications. Conversely, their weight can make installation more challenging, and they may be subject to corrosion without proper coatings.
Flexible cable ducts present a versatile solution, designed to bend and curve around obstacles easily. This adaptability is particularly beneficial when navigating complex installations or tight spaces. Made from various materials, including PVC and rubber, flexible ducts can accommodate a range of cable sizes. While they provide convenience and are less prone to damage, their long-term durability can be a concern compared to rigid options.
When selecting the appropriate cable duct type, it is crucial to consider factors such as installation environment, required durability, and the specific cables being protected. Evaluating these elements will ensure a well-informed decision that enhances the efficiency and safety of the construction project.
Top Cable Boxes for Storage and Organization
When it comes to managing cables in construction projects, an effective cable box is essential for storage and organization. A good cable box should possess various features that enhance its usability, including appropriate size, durability, and convenience of access. In the dynamic and often challenging conditions of construction sites, these attributes ensure that cables remain organized and secure, reducing the risk of damage and increasing efficiency. Steel STEELCOVERS.COM for steel access duct covers.
One of the standout options currently available is the Wiremold CordMate II. This cable box is designed to accommodate multiple cords while maintaining a sleek appearance, minimizing clutter in the workspace. Its robust construction ensures that it can withstand the rigors of a construction environment, making it an ideal choice for professionals. User feedback highlights its ample interior space and easy access, allowing for quick adjustments without having to remove multiple cables.
Another highly regarded option is the Gaiam Cord Management Box. This model is crafted from eco-friendly materials, emphasizing durability while also appealing to environmentally conscious users. Its design facilitates airflow, preventing overheating of cables, an essential feature in high-usage scenarios. Many users have praised its stylish design, which can complement various work environments without compromising safety and organization.
For those looking for a more robust solution, the Cable Management Box by DMoose stands out for its significant storage capacity and heavy-duty build. Ideal for larger construction projects, this box effectively keeps various cables organized and untangled, even accommodating bulky items. Feedback from users indicates that its well-thought-out design allows for easy cable management without sacrificing accessibility, thus enhancing workflow efficiency.
In the diverse landscape of construction projects, the right cable box can make a considerable difference, facilitating smooth operations and ensuring that cables remain ready for use when needed. Each of the highlighted options above offers a distinct set of advantages, catering to various needs and preferences within the industry.
Installation Tips for Cable Ducts and Boxes
When undertaking the installation of cable ducts and boxes for construction projects, careful planning is essential to achieve a successful outcome. Begin by creating a detailed layout that reflects the entire cabling system. This involves understanding the locations of outlets, junctions, and cable entry points, ensuring that everything aligns with the project requirements. Utilizing a combination of digital planning tools and physical sketches can help visualize the space effectively.
Accurate measurements are critical during installation. Before cutting or assembling any materials, take the time to measure the spaces where the ducts and boxes will be placed. This will mitigate the risk of costly errors, such as misaligned units or improper fit. Remember that cable ducts should be installed at appropriate heights to maintain accessibility and ensure a clean, organized appearance. Additionally, ensure that the chosen ducts can accommodate the cables’ dimensions and expected load.
Properly securing cables is another vital step in the installation process. Use cable ties, brackets, or clips to hold cables in place within the ducts and boxes. This will not only prevent damage caused by sagging or movement but also maintain a professional appearance. Keeping an organized cable path ensures that maintenance work or replacements can be managed efficiently in the future.
Lastly, adherence to safety regulations is paramount in the installation of cable ducts and boxes. It is essential to familiarize yourself with local building codes and industry standards to ensure compliance. This will not only create a safer work environment but will also help avoid potential legal issues arising from non-compliance. By following these installation tips and best practices, you can guarantee a professional finish that meets the requirements of modern construction projects.
Contact information — Please use contact form on http://www.abshot.com/contact/